Week 02 - Adjusting layout, and Effects and Lighting Test
Jan 13 - 19, 2026
Mentors Feedback and Suggestions
Camera movement and pacing are too fast; slow moves down ~15% and avoid busy or dizzy shots
Clearly define what the product is meant to communicate and show what it can do, not just how it looks
Many shots end in similar product positions; vary compositions and push more macro detail, especially in shot 2
Lighting should make painterly colors pop against a black environment, with FX emitting light where helpful
Be very product-accurate, including small details like LEDs
Highlight specific functional and internal details, not just top surfaces
Completed
Team Tasks
Shot 1-2: Fluid simulation test
Shot 3: Laser Test with compositing
Modeling
Gathering assets
Individual Tasks
Adjust layout according to the feedback
Shot 1 - Lighing test
Shot 6: Flying objects with particle simulation
Shot 6: Create mask for printed textures
To-Do Lists
Team Tasks
Textures selection for printed textures
Shot 2: Polishing the fluid motion and refining particle-to-fluid conversion and viscosity
Shot 4-5: particle simulation test
Particle-to-image simulation test
Individual Tasks
Shot 4: Colorful smoke with pyro simulation
Shot 6: Create mask for emission
Shot 6: Refine mask for printed textures
FX Test
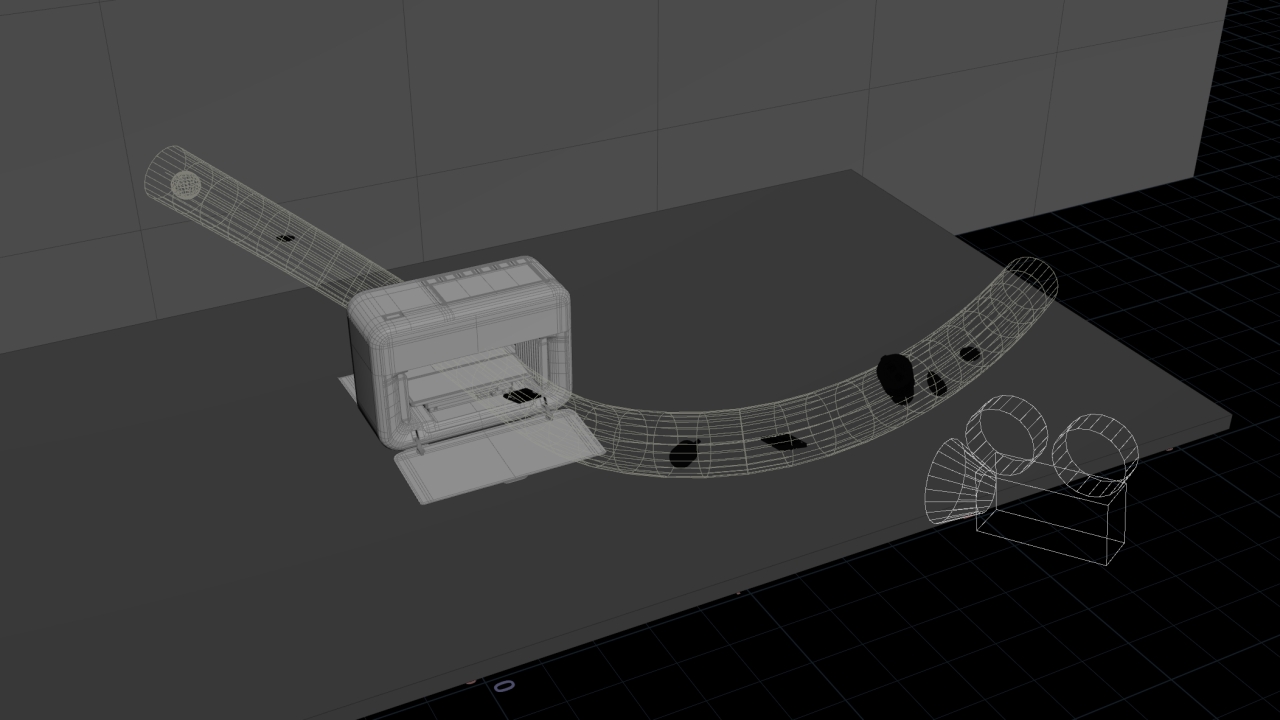
Shot 06: Flying objects using particles
Draw a curve to define the path the objects will travel along and sweep the curve to create a mesh
Convert the tube into a VDB then use it to generate a velocity field
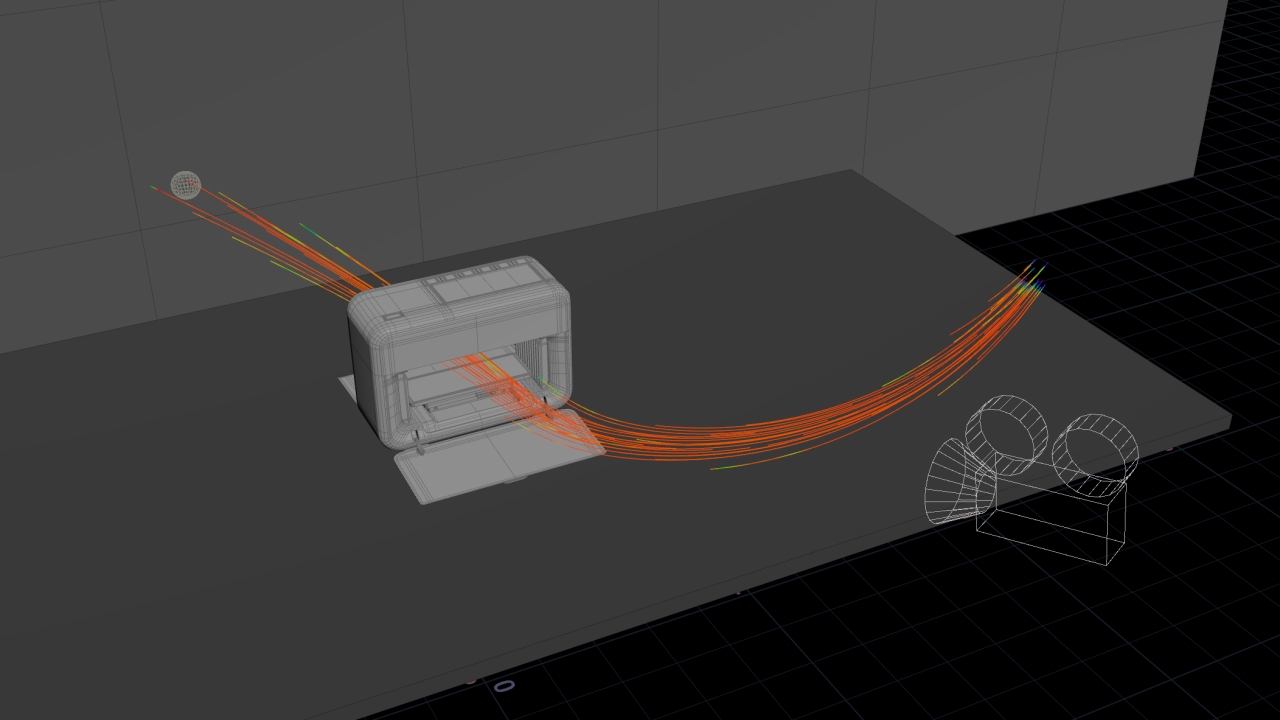
The velocity field guides and pushes particles smoothly along the path
Copy objects to points generated from a particle simulation (POP Net)
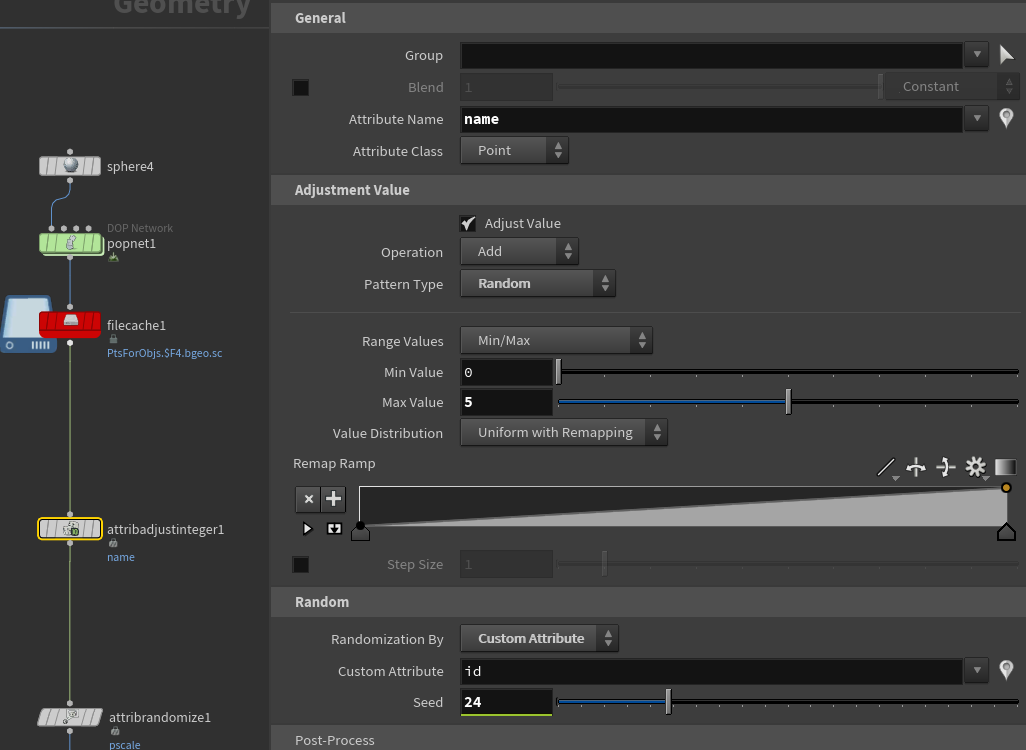
Use Attribute Adjust Integer to control an integer index per point
This index determines which object is copied to each point
Set the max value to match the number of objects to ensure valid assignment
Set Randomization By to 'Custom Attribute' and choose 'id' to prevent randomly change of objects
when the points from POP Net die
Change random seed in Attribute Adjust Integer
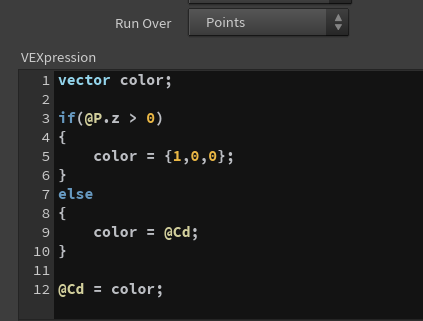
Shot 06: Create mask for printed textures
Change objects color when they reach a specific position
Use VEX code to turn color of the object in to red to create a mask for printed texture
Use Attribute blur on color attribute to smooth the transition between base and mask colors